CoVid, what a Trainwreck

Been a while since I’ve updated my blog, so here we are in the middle of a scamdemic, crazy, I, like all small businesses around the world have been affected by this flu renamed CoVid, the scientific evidence proves it’s all a scam, and that there is no pandemic.

People walking around with masks, weakening their own immune system, it’s beggar’s belief.

Anyhow, I for sure won’t be taking the government DNA altering vaccine that’s for damn sure!

My advice, for what it’s worth, go out, and enjoy your life as normal, don’t be a sheep, be in control of your own life, body and soul.

It’s all about control, the great reset,the great replacement, the new world order and a cashless society.

Be free 👊

Workshop Remodel Completed

Hello everyone, I’ve been so busy of late, I’ve not had much time at all to publish any new posts on my blog, with a move to larger premises, and a workshop remodelling, I’m now back up and running to full capacity again.

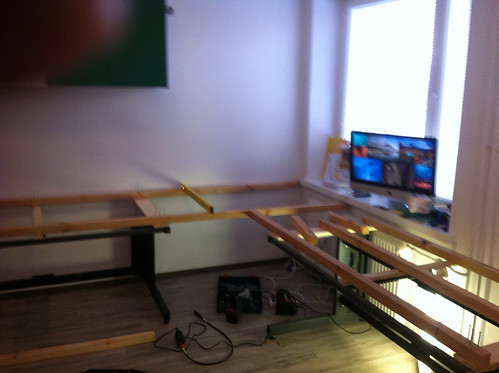
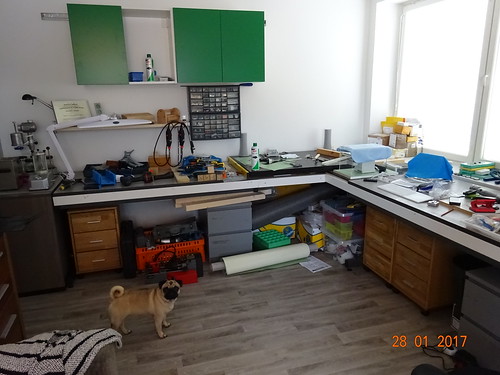
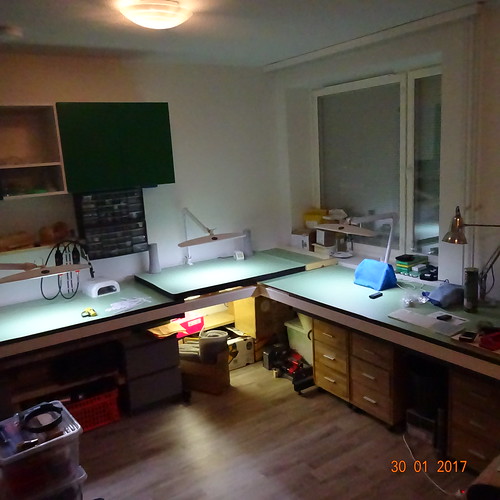
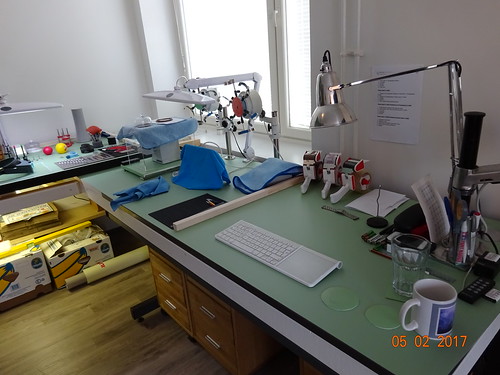
Here’s some photos of my workshop remodel, which started out as 2 x full size office desks, 31″ x 63″, which I have raised to 800mm on two areas, and 850mm on my main working area.  A watchmakers bench are usually higher than this, but I find these heights suitable for my needs.

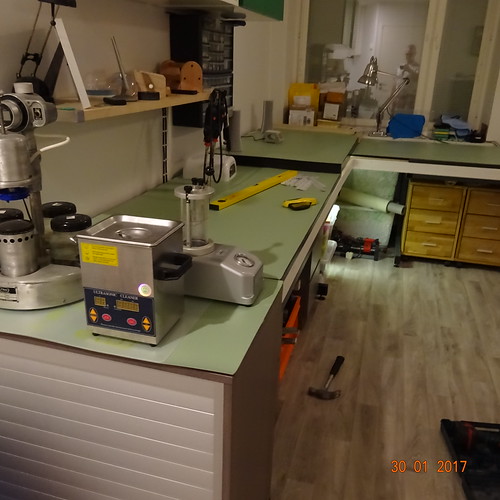
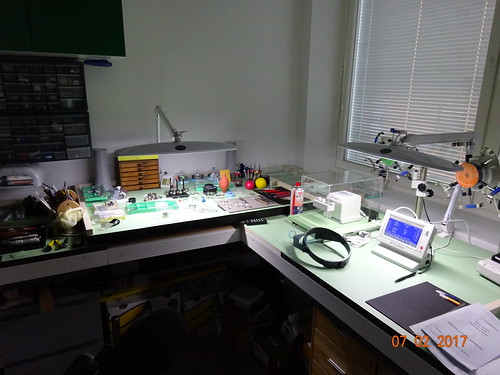
There’s three working platforms, the main central workstation, Timegrapher, Regulating, and Timekeeping monitoring area, and finally, Watch case and bracelet reworking area.

image

image

image

image

image

image

image

image

That's a wrap for today, next up laminating

Missing a shaking Stevens now, waiting for new stock

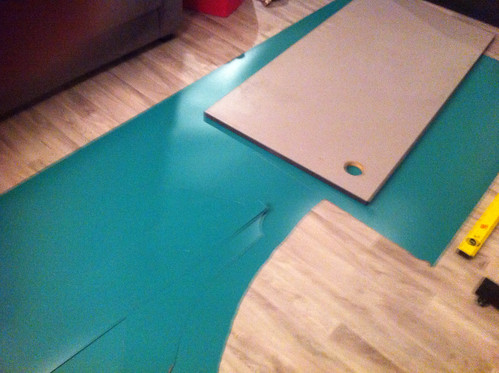
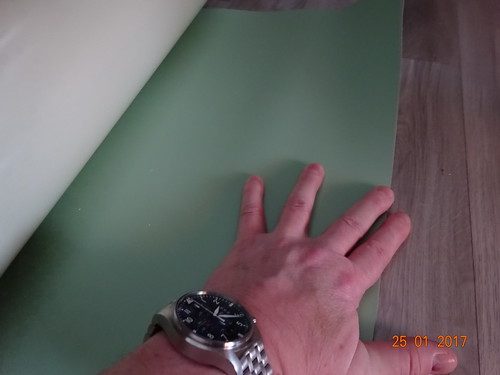
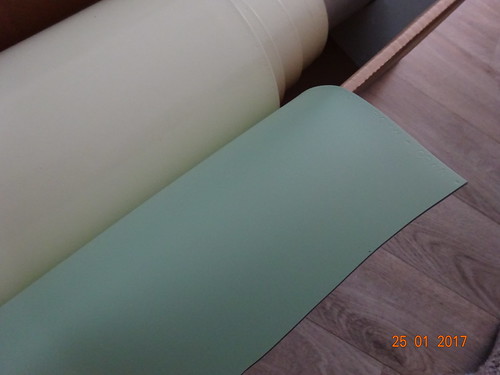
My original plan was to cover all my work tops with the same green covering as my wall units above, this was purchased from the UK, and transshipped to me via a good friend of WRT however, whilst it arrived safely, I was soon to find out that this laminate covering was so brittle, it actually shattered whilst I was measuring it up, and cutting it to size.

Broken laminate sheet

Disaster

Few hundred euros down the drain

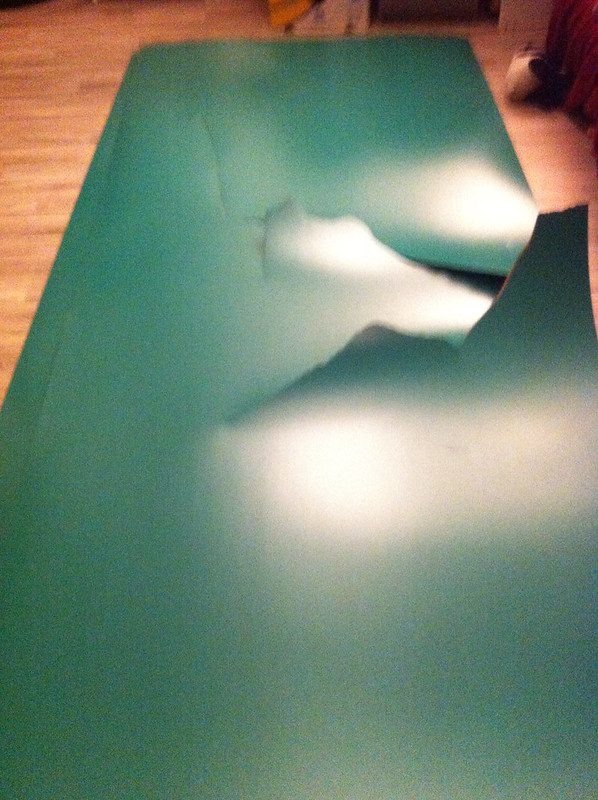
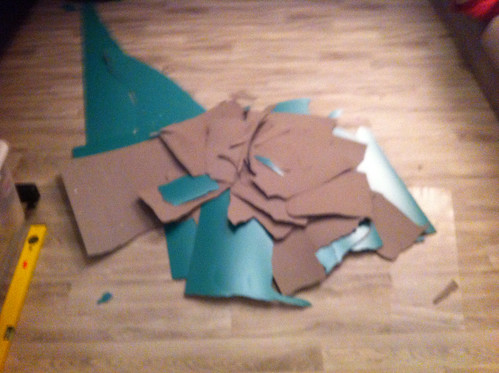
Ended up throwing away the two large rolls in the end, and had to come up with another viable option. I recalled seeing another option, but I had originally dismissed that idea due to the covering (same material that small watchmakers mats are made of) was only sold by outlets in the United States, which is odd considering it’s actually made in Denmark.

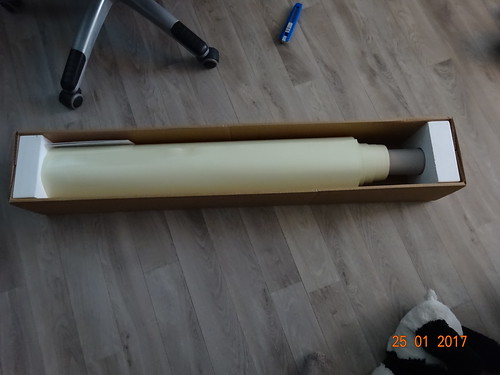
This material is called ALVIN Vyco 5 ply covering, I found out it was originally made in Denmark, once I had made my purchase, and imported a roll of 31″ x 10 yards. The leading edge of the material is embossed with MADE IN DENMARK.

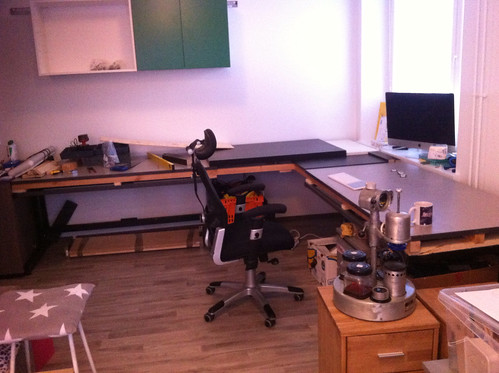
So whilst I awaited the delivery of the ALIV material, I proceeded to finalise my worktops, which were raised with lumber, 2″ x 2″, and 4″ x 2″.

Divider and splash panel to complete the refinishing area

Once I had raised, and fitted my work tops, I tidied the facias with skirting boards painted white.

First bench Fascia Fitted

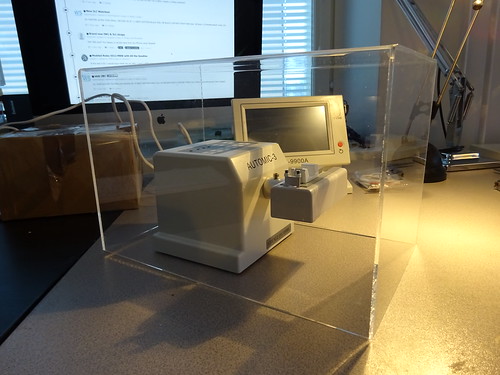
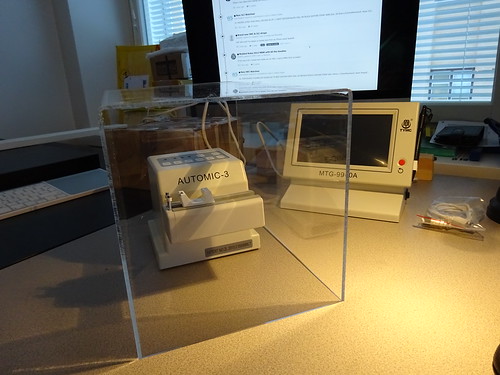
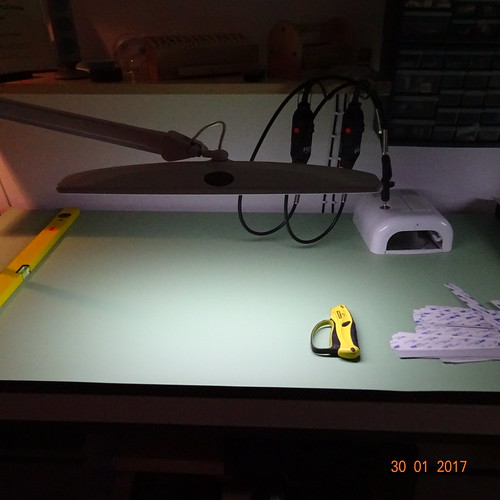
Part of my work top plan was to have a dedicated area, not only for checking timegrapher reading, but also a platform on a pair of sliders for my AUTOMIC-3, the idea for this is to have the ability to push the AUTOMIC-3 back out of the way whilst it carries out the six position tests of a movement, and then to bring the device/platform forward so I could regulate a movement in situ. I also opted for a dust/sound cover. Hopefully the photos will make things more clearer.

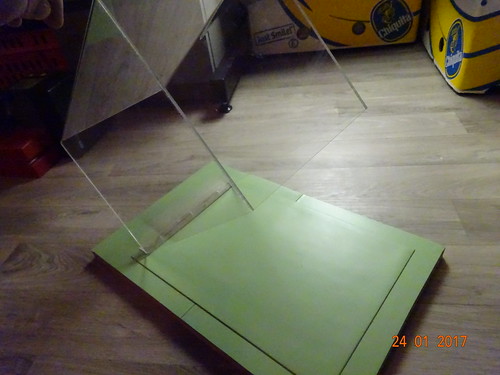
First I trial fit the dust cover.

Trial fit Dust/Sound chamber

Trial fit Dust/Sound chamber

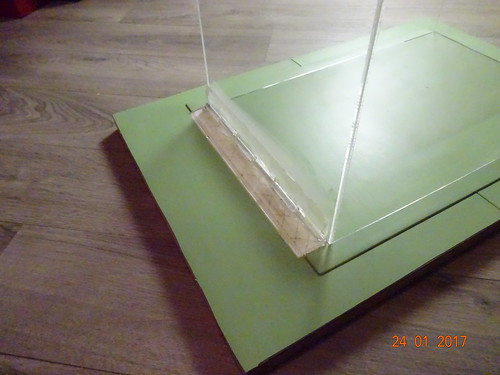
Then a trial fit of the sliding platform.

DSC04816

DSC04811

DSC04808

Securing the rear hinge.

Auto-Mic Sound/Dust Protection Base, and hinge fitted

Auto-Mic Sound/Dust Protection Base, and hinge fitted

Auto-Mic Sound/Dust Protection Base, and hinge fitted

I had originally planned to fit two lifting struts to both aid the lifting of the cover, plus to hold it in place when opened, however, this didn’t work out with the stuts below, they are way too strong and not fitter purpose in this case. I’m on the look out for a pair of lightweight struts.

Gas struts for mic box

Cut a hole for the cable routing, this, and the hinge area isn’t pretty, but seeing as it won’t be seen, I went for functional over looks in this area.

Cable exit to power and MTG-9900A Timegrapher

Ready to fit onto railing pull out setup

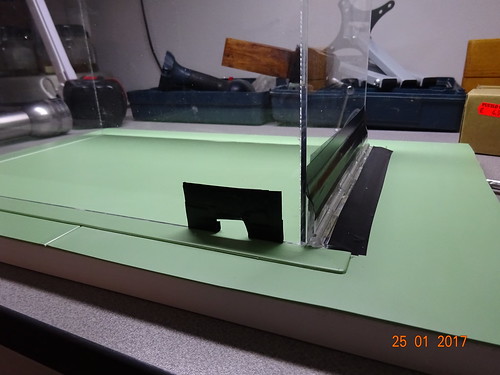
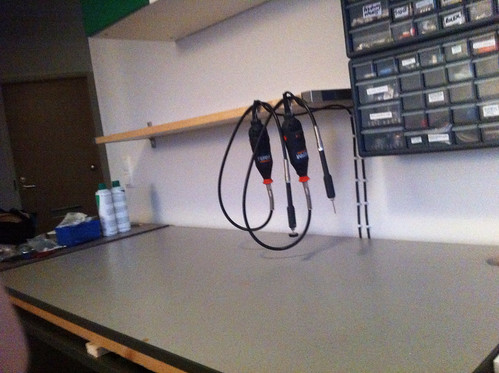
I wanted to ensure the cables (Power and Mic) were secure, and to not move the microphone at all when sliding the platform back and forth. I also set up the microphone cable in such a manner that it too would not be stressed from this movement.

Ready to fit onto railing pull out setup

The ALVIN covering finally arrived, very excited now, I will finally be able to finish my quest.

Alvin 5 ply worktop Covering has landed

Alvin 5 ply worktop Covering has landed

For reference..

Alvin 5 ply worktop Covering has landed

Alvin 5 ply worktop Covering has landed

Alvin 5 ply worktop Covering has landed

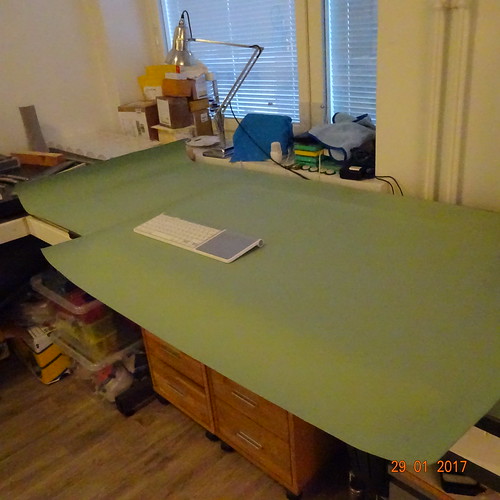
Now with the ALVIN here, and having read the fitting instructions, it states that the material is tension rolled, meaning that the material is stretched slightly when rolled, and as such, one needs to measure little oversize for each work top covering, and then having the lay each covering down on a completely flat surface for 24 hours to allow the material to relax to its normal state.

In order to do this, I need to remove everything which has gathered on my work tops.

DSC04855

Cutting individual pieces of ALVIN Covering

Individual coverings now cut to a little over the required sizes.

Cutting individual pieces of ALVIN Covering

Now I’m glad that I read the instructions that came with this ALVIN covering, as I was planning to use spray adhesive to adhere this covering down, just like I planned with that terrible laminate covering. The instructions advise strongly against this method, and highly recommend to use strong double-sided tissue tape, and only secure along the leading edges. This made fitting very easy.

Once the covering is secured, I then plan to add some balsa wood edging 25mm x 25mm.

Almost there, covering needs to relax a while longer, then to adhere and trim

Almost there, covering needs to relax a while longer, then to adhere and trim

Almost there, covering needs to relax a while longer, then to adhere and trim

Almost there, covering needs to relax a while longer, then to adhere and trim

Trimming is the final process, and then its ready to work on, that is, once I have finally unpacked all my tools, and equipment.

Almost there, covering needs to relax a while longer, then to adhere and trim

Almost there, covering needs to relax a while longer, then to adhere and trim

Almost there, covering needs to relax a while longer, then to adhere and trim

Here’s the type of slides I used for the microphone platform.

DSC04890

They are low runners, and are usually found on the underside of a full-sized office desk. Seeing as I were no longer using them, I thought of incorporating them into my project.

Fascia trim now fitted

Balsa wood arrived.

Wood for bench edging

DSC04922

The reason for my choice of using balsa wood is because it’s quite strong, but lightweight, and very easy to work with.

DSC04921

DSC04920

I used a hot glue gun to adhere the balsa to the work tops edges.
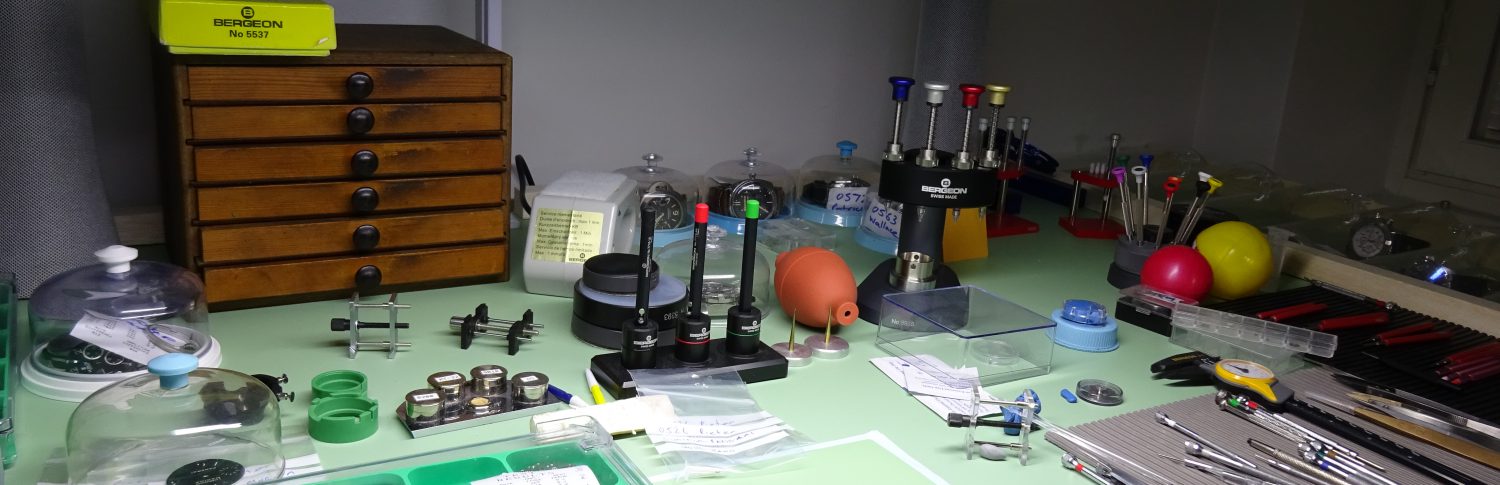
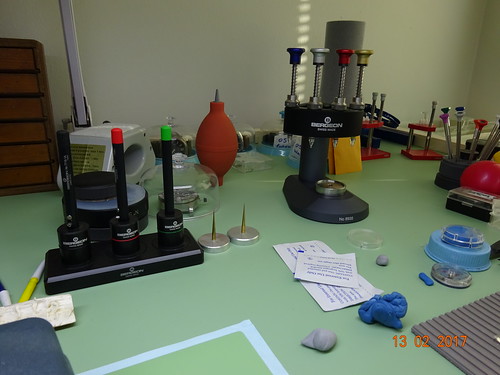
DSC04924

DSC04923

DSC05149

Ready to work.

DSC05376

DSC05414

Thanks for reading.

Seasons Greetings & All The Very Best for 2017

I’m hoping that during 2017 I will find the time to update my blog here, this last year has been manic having to work in a much smaller premises.

End of this month we will be moving back to SSTEEL Towers, and as such will have much more working space again, plus, I’m remodelling my workshop, so expect to take a glance soon, end of January.

Seasons Greetings and all the very best to you all for 2017.!

Should you wish to email me, I can be reached at ssteelwatchrepairs@gmail.com

If you do email me, please add “Blog Contact” in your email header so I know how you found my email address.

Thanks.!

Seasons Greetings & All The Very Best for 2016 From SSTEEL Towers

Merry Christmas

Doesn’t time fly by when your busy? It don’t seem that long ago since I wished you all A Happy Christmas last year!

I have been so busy this year, which is a good thing I may add, especially during the poor economy, there are always someone needing their prized possession restored to its former glory.

If you have been a customer of mine during this last year, may I take this opportunity to say it was a pleasure working for you as your watchmaker of choice.

I promise I will try to post more here during 2016, it’s long overdue that I post some helpful tutorials for you to learn from.

Anyhow, work calls, so haver a MERRY CHRISTMAS, and all the very best for 2016 wherever you are on this beautiful planet we call home.

Move to Temporary Apartment Accomplished

Moving Apartment

Moving apartment is never something we like to do, it’s something that is needed now and again in most cases, ours especially, our old apartment is over a Century old, and is in dire need of renovations, and as such, we needed to move out for six to eight months whilst it gets a makeover with up to date rewiring, new floors, plumbing, and heating.

Dust had become a serious problem, and this doesn’t bode well with watchmaking. Our temporary apartment is dust free, however, it is much smaller than what Im accustomed to. Needless to say, I have managed to shoehorn my workstation in here, so can continue with my watchmaking work.

The move coincided with a ongoing postal strike here in Finland which made matters worse, but thankfully, this strike is now over, and with over 30 incoming packages currently held up in the postal system backlog, things are about to get very busy indeed.

Fortunately I shipped out over 20 packages yesterday, and would like to thank all my customers for their patience in waiting for this strike to come to a close.

Here’s a look at my new workstation, and where I will be working hard for the coming several months.

Almost set up in temporary apartment

Soon it will be that time of the year, Christmas, so may I take this opportunity to wish each and every one of you Seasons Greetings, and all the very best for 2016.

Swiss ETA Movements and How to Tell a Clone ETA

Its been very busy here at Sapphire & Steel Towers these last several months, but with Christmas fast approaching, and an apartment move end of this month, I thought it high time I updated my blog to let you all know that I am still active, and working as a Service Provider.

What I would like to share with you today is some helpful labelled photos which will help you determine a genuine Swiss ETA movement to a Clone ETA movement, but moreover, how to even tell a POS Clone, aka Z2 from an ETA Clone, and Swiss ETA.

The Z2 is the far right movement in the image below..

14441796097_d50ca59b84_o

Yes, there’s even clone movements based on cloned movements, its all getting a little messy now, and more and more people are getting duped when buying a watch under the impression they are buying a genuine Swiss ETA movement watch when in actual fact are being sold a watch with a very inferior movement fitted.

Hopefully the following photos will help you to check your watch movements yourself, and then be able to determine if you have indeed the Swiss ETA movement you paid for or not.

I have the unpleasant task of informing customers on a weekly basis that what they thought was a Swiss movement in their watches are anything but, and are merely a cheap, poorly built cloned movement from China.

So what are the differences, and how to tell these movements apart.? The following photo is of the main area to check, and this particular photo is of a genuine Swiss ETA 2836-2 movement, and what it should look like.

https://farm6.staticflickr.com/5808/23112129526_5445865f01.jpg

Next photo is of a Z2, aka POS Clone, its a clone, or a clone ETA movement. Looks ok right?

https://farm1.staticflickr.com/660/22770349099_3c67f092ea.jpg

Wrong.! Lets take a closer look.

https://farm1.staticflickr.com/727/22770386219_3ec3aced40.jpg

The above photo highlights an easy tell that this is a cloned movement, see that screw where the dial foot would normally be secured by a ETA hook?

Another indication this movement is a clone is the click spring. Look closely at the photo below, specifically the ratchet wheel, see that silver tab? Thats this clone movement click spring location.

https://farm6.staticflickr.com/5672/23148766602_a844645c44.jpg

Another look at this click spring from another angle..

https://farm6.staticflickr.com/5699/22770468789_ac2bac8c27.jpg

The second dial foot securing area also has a screw, whereas the Swiss ETA, and Clone ETA has a hook, more on this later.

https://farm6.staticflickr.com/5737/23138459385_499b4b1b15.jpg

Now, using the first photo as reference, lets take al look at this Z2 ETA Cloned clone movement balance area..

https://farm1.staticflickr.com/640/22842657910_c439e087f9.jpg

No stamping at all. Now whilst we are talking of stamping, the first generation of Clone ETA movement even have fake ETA stamping to make them fool people, more on this once we have seen this Z2 movement more.

The next photo is looking at the Z2 movement from the dial side.

https://farm6.staticflickr.com/5799/22744387027_4936b57447.jpg

Its completely different from the ETA 28XX and ETA Clone 28XX movements, but that didn’t stop the Chinese trying to fool us with the second generation Z2 pictured below the three first generation Z2 pictured below..

https://farm1.staticflickr.com/600/22842759430_0b3c03c03e.jpg

These Z2 movements whilst visually very similar to the Swiss ETA movements, their parts are not interchangeable with the ETA Clone, or Swiss ETA 28XX movements.

Even the stems are different..

https://farm1.staticflickr.com/584/23112780336_b0fbce86e0.jpg

Talking of ETA Clone movements, and as mentioned earlier, these are branded with fake ETA Stamps, there purpose is solely to fool people. These stamps are easy to tell to the trained eye, so lets educate you on how to check these, and another easy tell which I will point out.
https://farm6.staticflickr.com/5750/22744833567_3a267dfcf1.jpghttps://farm6.staticflickr.com/5774/23112874756_caf2a4043d.jpg

As you can see from the above photos, the ETA stamping is present, but is of poor quality, and not sharp like a genuine Swiss ETA movement, but having said that, I have had clone movements come across my workbench with very crisp Clone ETA stamping, the Chinese must of acquired genuine tools, or are getting better at their faking methods.

As promised, here’s another easy tell, look closely at the balance bridge trip jewel housing, it only has one cut out for the jewel spring.

https://farm6.staticflickr.com/5831/23174902741_1f7b1efdb8.jpg

The Genuine SWISS ETA has three cut outs which can be seen in the very first photo in this blog post..

https://farm6.staticflickr.com/5808/23112129526_5445865f01.jpg

And I’m afraid to say, this is the tip of the iceberg, there are tonnes of Chinese clone movements, from 7750, 7753, Venus, Seagull, and many more, and with The Swatch Group restricting, or in most cases, stopping parts supplies to Independent Watchmakers end of this year, we are going to see more, and more clone movements in the marketplace.

That’s all I have time for today, so back to work, my next blog entry will be once we have moved apartments.

Thanks for reading, and I hope you have learned something from this post.

AirDuster vs DustOff 400ml Cans of Air -BlowOff

Unknown

Many of us use cans of air, be it to dust off areas of the workbench, or desk, clean out computers, laptops, especially those fans, but more importantly as a watchmaker, one is quite dependant on the stuff. Cleaning out watch cases, dusting off dials, ensuring a watch is completely dust free before re-casing the movement.

It starts to get expensive too, here in Finland, its almost €15 euros a can of this 400ml DustOff, and as you can imagine, getting through 30+ per year, the costs stack up. This is the sole reason I will be going the diver scuba tank route, the test oxygen tanks can be found around on eBay etc, and a full tank will last around 18 months, with refills only €17 euros per year, yes, I found an actual dive shop in Kuopio, Finland. Run a pressure gauge, and level gauge, and you are all set. Of course with a pipe and trigger for your actual use too.

Anyhow, back to the purpose of my post, I have been using the 400ml DustOff for the last couple of years now, and as mentioned I will be going the Scuba tank route later this year, but in the meantime, I searched for a viable alternative until then, and found an eBay seller selling 6 x 400ml cans of air, brand new for the same it costs me for just one can, this price with DHL shipping came to €30 euros, bargain right?

Well, er, nope, the first thing I noticed was when the actual DHL package arrived today, I thought to myself, this is a bit light, and then when I proceeded to open the box, although there were indeed six of these 400ml cans of air, each one felt half empty, so decided to actually weigh, and compare one of these 400ml AirDuster cans against a new full can of 400ml DustOff.

First up, the 400ml AirDuster, weighing in at just 288.3grams

400ml Air Duster Weight 288.5grams

Onto the 400ml DustOff, which was indeed heavier at 548.3grams, 50% heavier than the AirDuster.

400ml DustOff weight 548.3grams

So what does this exactly mean? I am not one for assumption, we all know that the mother of all *** ups is based on this, but in this case, I can only imagine, someone is skimming profits off the top of these somewhere down the line. The eBay seller may well be innocent in all this, or they could of purchased in bulk, unfinished/processed cans of air at a major discount. Who knows. Certainly begs the question, and I will certainly not be buying anymore of these AirDuster cans, thats for sure.

https://farm8.staticflickr.com/7515/16325452062_792f066f58.jpg